
Amazon Web Services (AWS) has been a game-changer in the IT industry, revolutionizing the way we work. From humble beginnings with a small EC2 instance, AWS has evolved to offer powerful solutions like AWS IoT Greengrass for building IoT solutions. Throughout this incredible journey, AWS has consistently been the best friend of Computer Science Engineers, offering Elastic Beanstalk Servers, RDS, DynamoDB, Sagemaker for ML Engineers, and Glue, Glue Crawlers, Athena for Data Engineers. And now, AWS is here to support frontend developers too, with the amazing AWS Amplify—a one-step solution for deploying and hosting your frontend applications.
Traditional Approach vs. AWS Amplify: A Refreshing Change
Previously, when a frontend developer wanted to release their application on AWS, they had to go through a series of steps. For example, let’s consider the process of releasing a React project:
Step 1: Create the project build.
Step 2: Push the build code to S3.
Step 3: Set up static web hosting in the S3 bucket and configure AWS bucket policies.
Step 4: Configure a CloudFront Distribution.
And if DNS mapping was required, one would need to worry about setting up aliases in Route53.
Clearly, the process of setting up a frontend application on AWS involved numerous steps. But that’s not all—every time changes were made, developers had to rebuild the project and push the new build to S3.
Now, enter AWS Amplify—a breath of fresh air for frontend developers.
Simplifying Deployment with AWS Amplify
Deploying with AWS Amplify is a breeze compared to the traditional approach of setting up S3 buckets and CloudFront Distributions.
AWS Amplify acts as a convenient wrapper for S3 and CloudFront. With this powerful tool, all you need to do is push your code to GitHub branches, and it automatically syncs across different environments such as staging and production. The AWS Amplify console allows you to effortlessly manage these environments.
Here’s how you can set up your project using AWS Amplify:
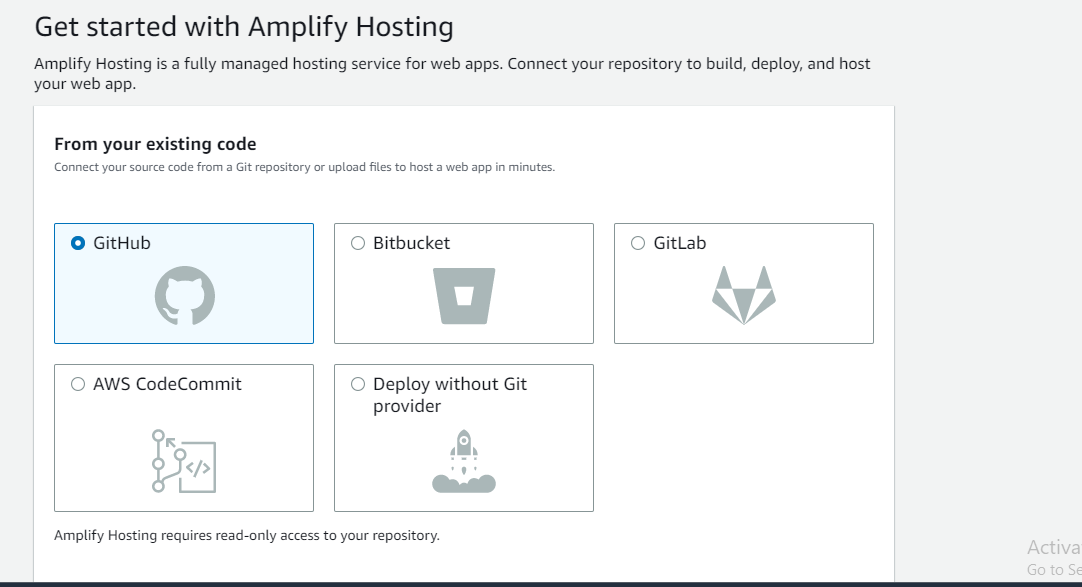
- Open your AWS account and navigate to the AWS Amplify service.
- Click on “Getting started with Amplify hosting.”
- Connect your version control tool (e.g., GitHub) from the provided screen.
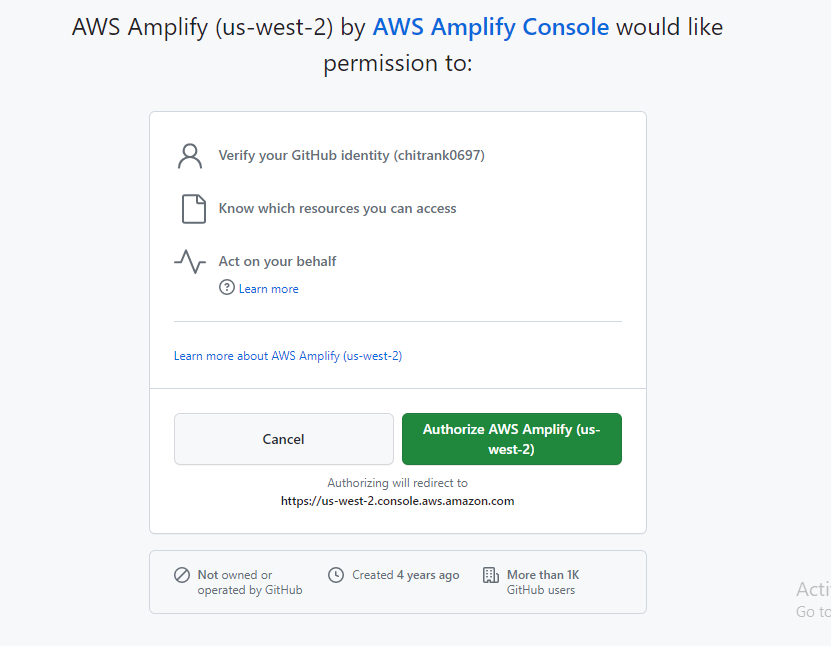
- Next, you’ll be redirected to authorize AWS Amplify to access your GitHub account.
- Select the repository you want to integrate
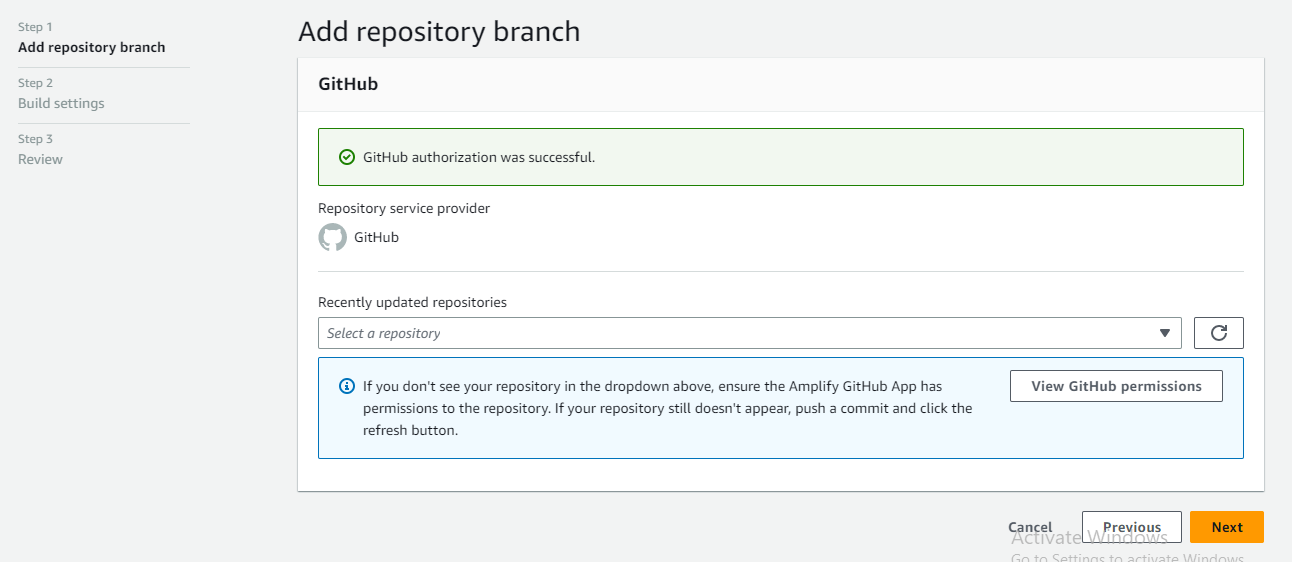
- Choose the branch for deployment; currently we have two branches, “Main” and “Stage”
- Set up the IAM role on the subsequent screen
- Finally, review and deploy your project on the last screen.
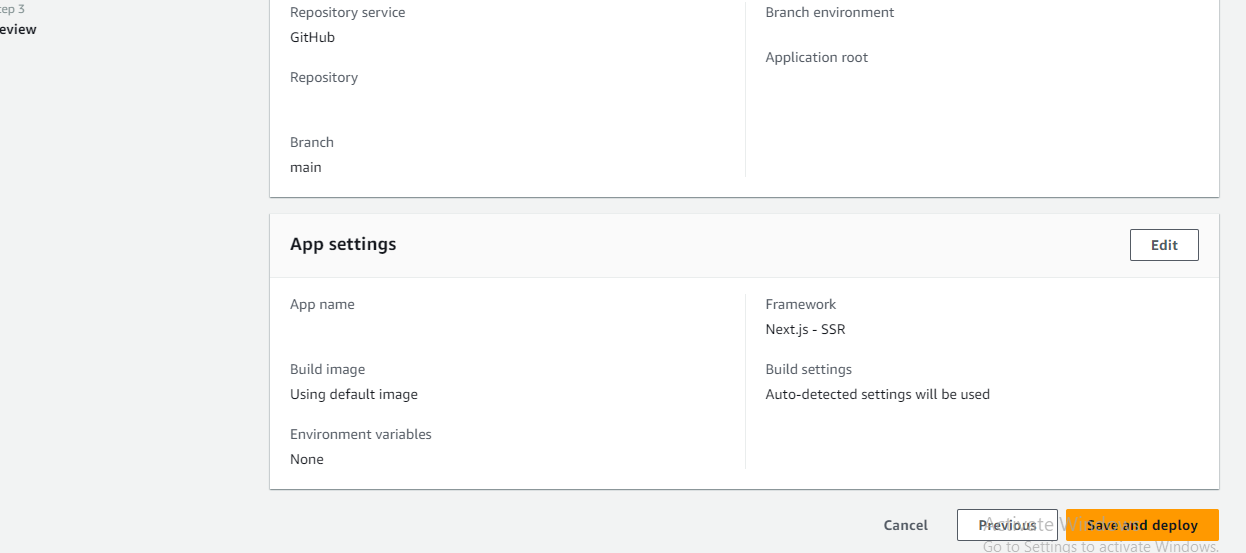
- Voila! Your project is created, and you’ll receive your project URL.
Advantages of AWS Amplify:
- No need to worry about CloudFront distributions or complex configurations.
- Eliminate the hassle of creating project builds—AWS Amplify automatically handles it for you.
- Effortlessly set up and release different environments, such as staging and production.
- Enjoy DNS management features as part of the package.
- Say goodbye to creating S3 buckets; AWS Amplify takes care of it.
- Enjoy a user-friendly console that simplifies your development workflow.
- Seamless integration with popular version control tools like GitHub and Bitbucket.
So why spend precious time dealing with CloudFront validations or struggling with S3 bucket policies on weekends? Give AWS Amplify a try for your code deployment and hosting needs. It’s a surefire way to lighten the burden on frontend developers while automating key processes—an absolute bonus for DevOps.
Unleash the power of AWS Amplify and let your creativity flourish as you build outstanding frontend applications. It’s time to have fun while deploying with confidence!

Chitrank Tyagi
Lead Software Engineer
Chitrank is a tech enthusiast, who loves to code and is fond of playing with AWS services. He believes one should never be afraid of taking the first step as, that one step can be a difference in transforming you to a better version of yourself.